Table Of Content

Download our commercial wine cellar lookbook — showcasing one of a kind commercial wine rooms that turn heads. Showcase your collection with the originators of the label-forward wine rack. Take two more wood pieces and lay them on each side of the three wood pieces used for the back.
How to Build a Wine Rack: From Design to Installation, A Comprehensive DIY Guide
Dark walnut stains never disappoint when you want to create a warm design that can fit into brightly colored backgrounds. This large project will take a lot of materials, cutting, and attachments, but it will be worth the effort. Ensure to use durable wood to ensure the stability of the project, as the top serves are a table surface to utilize space and help with multi-functionality. A well-chosen wine bottle holder not only showcases your bottles but also ensures they are stored in a way that preserves their quality and flavor. Get a step-by-step breakdown of everything involved in building your own custom wine cellar.
Modern Wine Rack Designs With Ingenious Storage Systems
Each step of the process, from measuring and cutting the wood to mounting the rack on the wall, has been a testament to your dedication and ingenuity. It has a rectangular frame made of steel which makes it super sturdy and durable. It’s also very compact considering it can hold 23 bottles in total and it takes up very little space on the floor. You can place this rack directly on the floor and use the top surface as a little table of sorts. In this case, the stainless steel wine refrigerator seamlessly blends in with the appliance wall. If you want to enhance the rustic appeal of your wine rack, consider staining or painting it.
Invest in the perfect piece
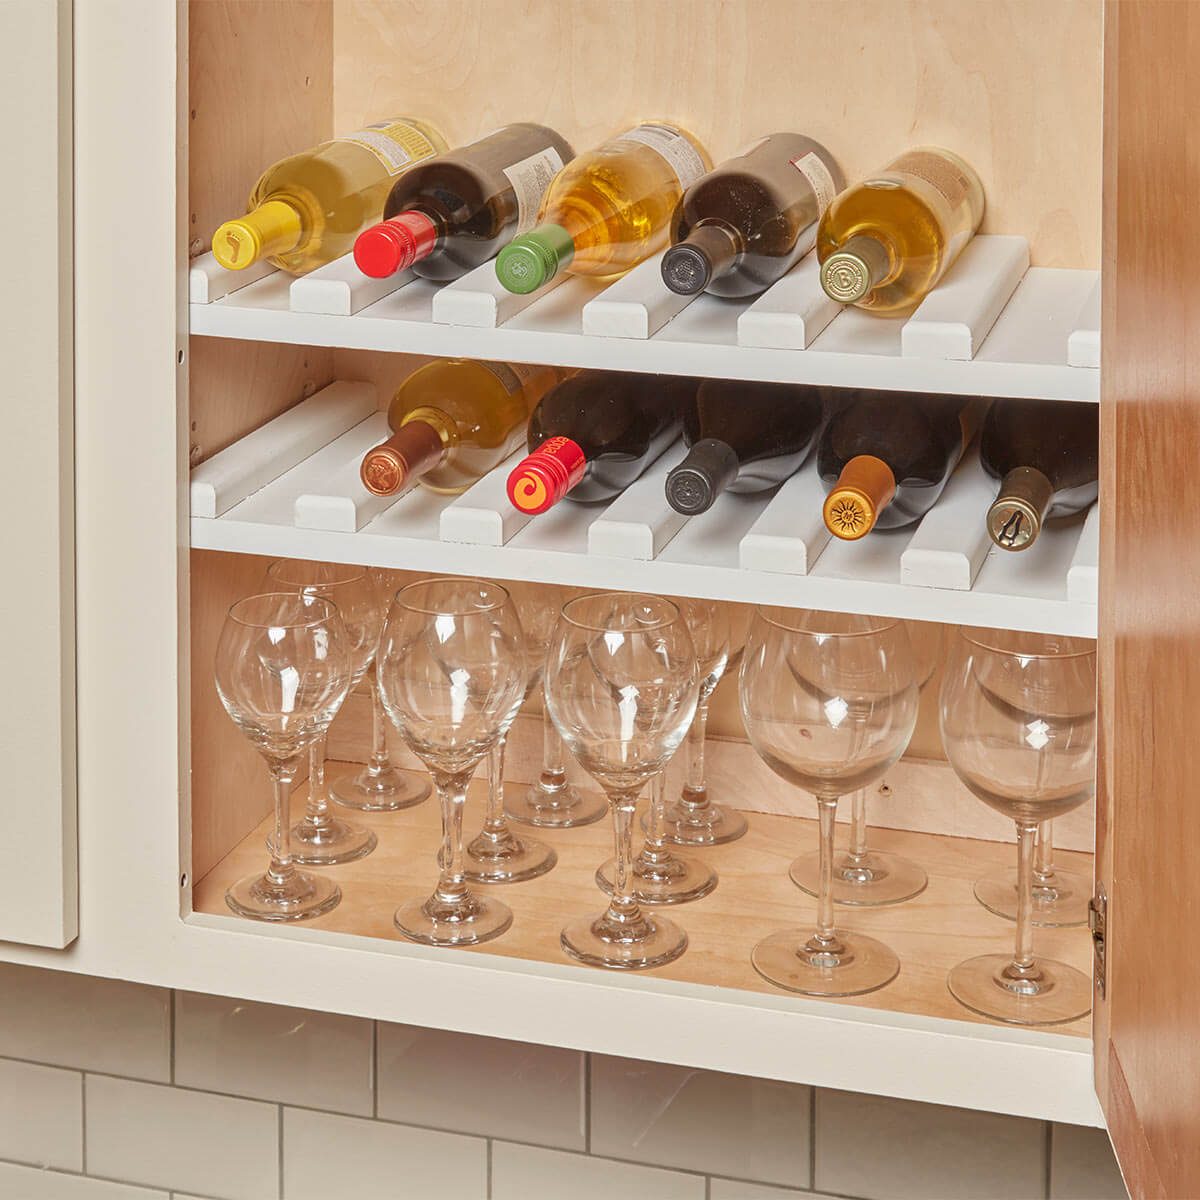
It’s an excellent space saver with a printable pattern for a more straightforward process. This sturdy cabinet can fit fifteen wine bottles and up to twenty wine glasses. The circular wine rack features two wooden boards with cylindrical holes arranged in a parallel manner so that the wine bottle rests neatly inside the holes. You can place the rack on its sides with the wine bottles sitting in a horizontal line or a vertical arrangement which offers very little stability. Most racks are hung on the walls and kept on countertops because of their size and lack of stability.
You can also further improve this wine rack by painting this the color you want. Overall, it is a simple pallet rack design that would surely be a good inspiration for your own project. This rack has a pallet body that is sturdy and ready to handle three bottles of wine.
Test Fit Boards
This wine rack sports a classy look but with a simple square design. Its navy green finish gives it a different look, further boosting its classy aesthetics. It features a wine rack layer that can house a few wine bottles and a glass layer underneath where you can store up to four wine glasses. If you have tens of wine bottles to store, you’ll soon realize these small wine racks are ineffective for your storage needs. Like this classic wine rack design, you need a rack accommodating many bottles.
Tools Required
Once the studs have been located, mark the positions where the rack will be mounted, ensuring that it is level and aligned with the surrounding decor. Once you have the measurements in mind, use a measuring tape to mark the lengths for the 1×4 pine boards. A miter saw or circular saw can then be employed to make precise cuts according to the measurements. It’s crucial to ensure that the cuts are straight and accurate to guarantee a seamless assembly later on. You can place this interesting piece on top of a bar, the kitchen counter or kitchen island and be the envy of all your friends and guests. Sophie has been an interior stylist and journalist for over 22 years and has worked for many of the main interior magazines during that time both in-house and as a freelancer.
Further down you can follow the 30 steps to building this wine cabinet. It shouldn’t take you more than $15 to $20 to purchase the materials and complete this DIY wine rack plan. A chic and modern addition to your home, these wine cellars will protect your valuable collection.
Featured Wine Racks
Simple to build and perfect for beginner DIYers, this project features a combination of ease and style. This project requires a 2x4x10 board, 1x4x8 pine or white wood board, metal label holders, and woodworking tools. Start by cutting and joining the board pieces before attaching the cup support. Cut two spacers into the lower wine support lumber before attaching them to the board.
Diy Wine Cellar Racks Deals atlantaprogressivenews.com - Atlanta Progressive News
Diy Wine Cellar Racks Deals atlantaprogressivenews.com.
Posted: Thu, 25 Apr 2024 22:50:42 GMT [source]
This design can be used vertically or horizontally and holds up to 6 bottles, it’s made from oak and will certainly stand the test of time. If building your wine rack seems like a daunting task, Wine Stash offers a wide range of wine racks in different styles and storage options. Whether you prefer wall-mounted racks, floor-standing racks, or modular racks that you can customize, Wine Stash has the perfect solution. Assembling this project is easy after making the cuts, with the whole project taking less than three hours to complete, aside from the time the paint takes to dry. Only two nails into the wall are enough to hold this rack since it only carries a few wine bottles.
If you don’t plan to move the table around too often, you could even store some items under this piece of furniture. This guide teaches you to build a 10-bottle wine rack along with a lower drawer, wide shelf, and an even larger table. You could add some fun to your parties by making this the game table. If you’re looking to build a wine rack to keep your wine safe, here is a collection of free designs with clear plans to follow. They include plans of varying designs, sizes, and experience levels. If you want the ultimate in wine storage, then this much just be it.
Simple does not always mean unappealing, as this design has proven with its simple yet classic wine rack design with a box-like storage system. Here the wine bottle tip is extended out of the storage box through a cylindrical opening. The storage rack stands on four stylish legs similar to TV stand legs.
By setting the wine rack at the appropriate angle, it enables wine enthusiasts to maintain the quality and aging potential of their prized bottles. When building a wine rack, it is important to consider the ideal depth to store wine bottles horizontally. According to experts, a wine rack should be at least 14.5 inches (37 cm) deep. This depth allows wine bottles to be stored on their sides, which is the optimal position for long-term storage. Storing wine horizontally ensures that the cork remains in constant contact with the wine, preventing it from drying out and allowing the wine to age properly.
Whether you live in a small apartment with limited space or you have a large kitchen with plenty of space for custom built-ins, we're sharing 30 of our favorite ways to store wine bottles. If you enjoy having a nice chilled glass of red in the evenings, but are tired of bottles cluttering your kitchen countertops, we've got you covered. With the wood cut to size, sanded, and stained, it’s time to bring the components together and assemble the frame of your wall wine rack. The assembly process is where the individual pieces seamlessly unite to form a cohesive and robust structure that will elegantly display your wine collection and glasses.
As the wine glass holder becomes an integral part of the rack, take a moment to envision the visual impact it will have once adorned with your favorite stemware. The seamless integration of the holder not only enhances the functionality of the rack but also elevates its aesthetic appeal, creating a harmonious display that is sure to impress. Once the wood glue has been applied, reinforce the joints by driving wood screws through the boards. This additional measure ensures the structural integrity of the frame, providing stability and peace of mind as you prepare to mount the rack on the wall. This is the kitchen designed by studio zone zuid architecten for a house which they built in Roosendaal, The Netherlands.


No comments:
Post a Comment